This post may contain affiliate links. Please read our disclosure policy.
Here’s a simple How-To on making those gorgeous Dahlia Flower Tissue Paper Pom Poms you see in magazines and on the Internet. So easy, you’ll be looking for places to hang them around your home! They’re such a fun summer craft.
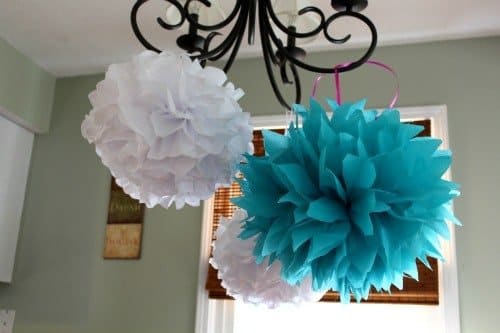
How To Make Tissue Paper Pom Poms Easily!

1. Start by stacking eight to twelve 20×30 inch sheets of tissue paper of all the same color.

2. Measure from the short edge of the paper up 1.5 inches and 3 inches and mark at each spot.

3. Start to accordian fold the paper from the short end all the way up the length of the paper in 1.5 inch increments.

4. Fold the paper in half to find the center and tie a ribbon, fishing line or floral wire around the center to hold the paper in place.

5. Using scissors, trim the ends of the paper into a point or rounded.

6. Start separating the tissue paper layers from each other, pulling toward the center CAREFULLY.

7. Pull the layers all the way around the pom to create the full Pom look you’d like.

8.. Using a ribbon or fishing line, hang the newly made Pom from the ceiling or light fixtures.

That’s it! You can now create beautiful Pom Poms on your very own!
If you like this post…check out my post on making a Cupcake Wrapper Door Number for your next party!


Thanks for linking to Create Link Inspire at The Crafty Blog Stalker. You have been featured and pinned! Thank you for sharing.
–Katie, TheCraftyBlogStalker.com
I made 400 tissue paper pom-poms for my daughter’s wedding and they made a fantastic effect. Really wonderful! Thanks.
Thank you for your post! When doing my daughter’s party I looked through many to find a non-wire needing puff ball and your post was very helpful, in fact I shared it (http://diy4mommies.blogspot.com/2012/06/pirates-pixies-party.html). Hope others see your great ideas.
Thanks again!