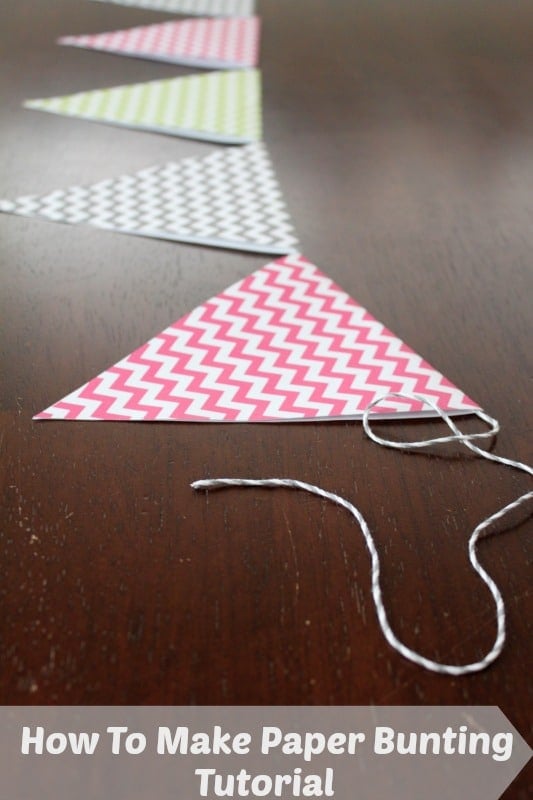
Looking for the perfect addition to your next party? Use these fun flag garlands as a super fun and inexpensive way to a special occasion even more special! This is perfect for a baby shower or makes for the perfect party decorations!
If you’ve followed me for any amount of time, you know that I’m all about Birthdays. I love planning, making decorations, cookies, cakes, and more! It’s such a fun time to celebrate a special day. Right now we’re getting ready for my oldest’s 8th Birthday. WOW! I can hardly believe it!
The thing is, this year she wanted to do a party at the skating rink. Well, that’s all good – but they plan the whole thing! GASP! Yes, most parents would love that – but I am really going to miss planning and preparing every detail. They even do the cake! But, that’s OK – because I have a plan. I’m taking a few things to personalize it and this Paper Bunting is one of them!
I just couldn’t imagine not making a few things for Ella’s special day – so I headed to Hobby Lobby and picked up some crafty stuff to get together. Of course, I waited until the last minute since the party is tomorrow – but not to fear! This bunting takes no time and practically no money.
I picked up 6 pieces of scrapbook paper ( a little thicker in weight) for only $.22 apiece and a roll of string for $2 – which makes the grand total only $3.32! If you happen to have paper or card stock at home, and either ribbon or string – you could probably make this baby for next to nothing!
This paper bunting is simple to make and only takes about an hour. Here’s my easy tutorial to help you out for the next fun event you have planned!
DIY Paper Bunting Tutorial
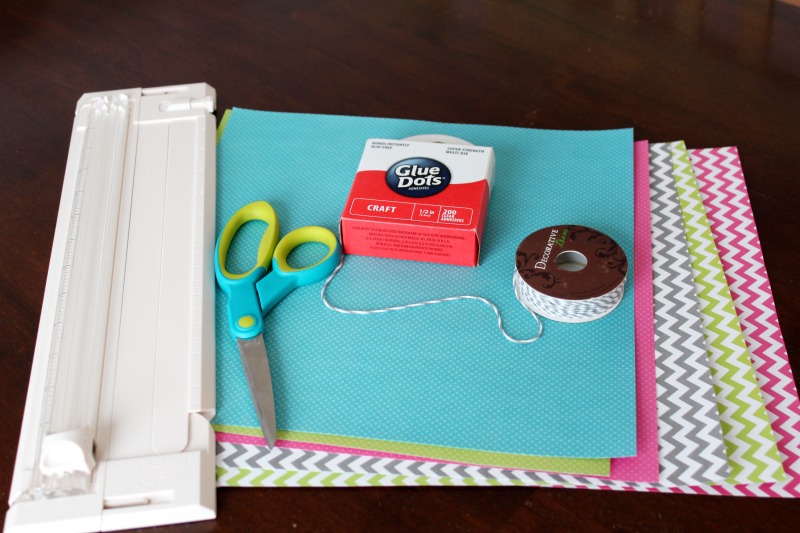
First – grab your supplies. I used 3 pieces of scrapbook paper, string, scissors, and a paper cutter – which isn’t really necessary if you’re good at cutting straight lines. I am not. Each piece of paper will give you two 6″ triangle pieces with this method.
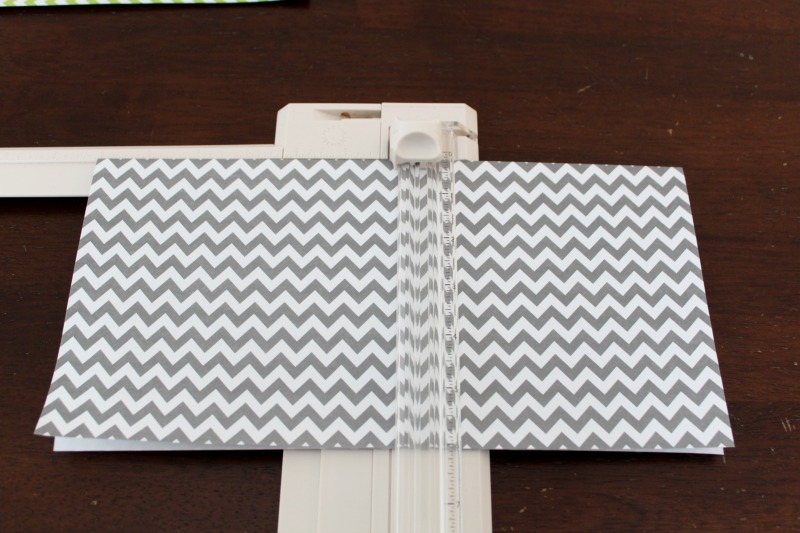
Next – fold your piece of paper in half and use the handle of your scissors to get a nice crease. Once the paper is folded – measure and find the middle of the paper.

Cut your paper in half in the middle – resulting in two squares.

Next – find the middle of the square on the end of the paper that is open and NOT folded and make a mark. Take your scissors and cut upwards in a diagonal cut towards the top of the paper. Do the same on the other side of the paper.
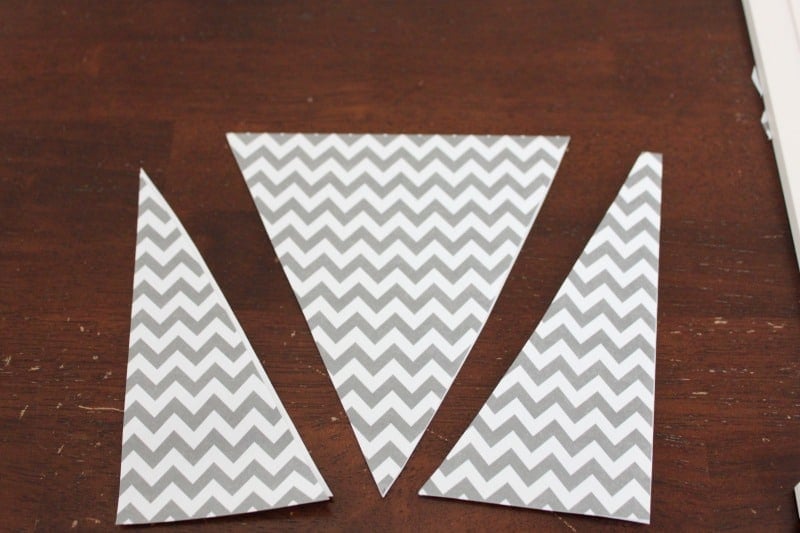
You now have a triangle!
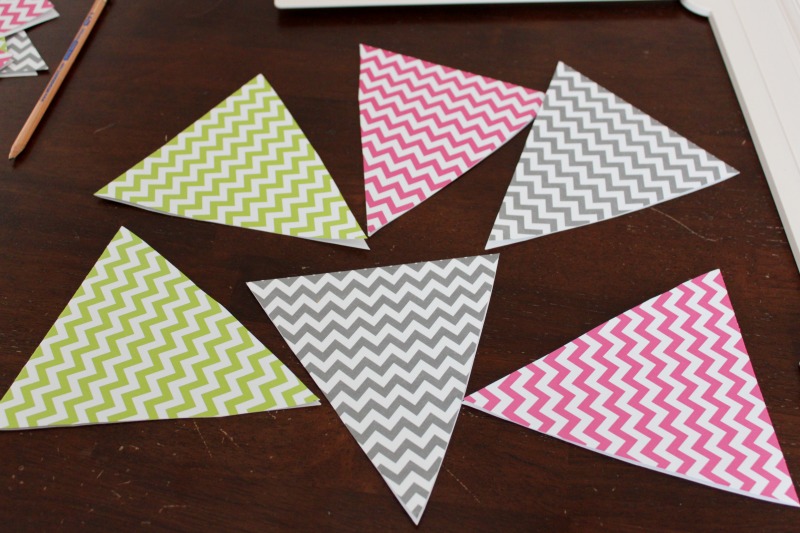
Continue this with the remainder of your squares until you have all the triangle pieces you need for your bunting.
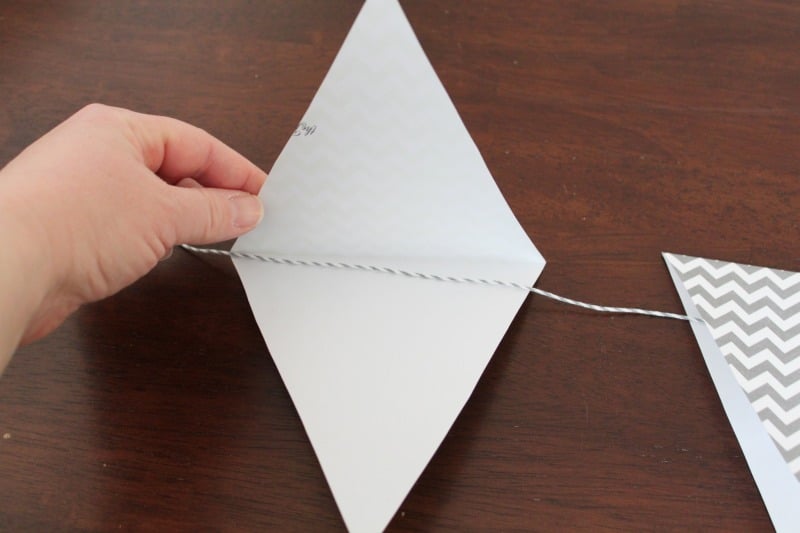
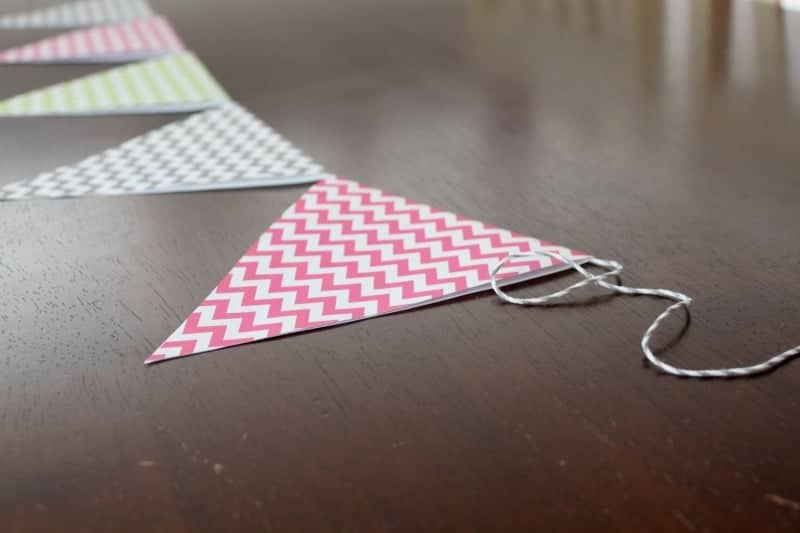
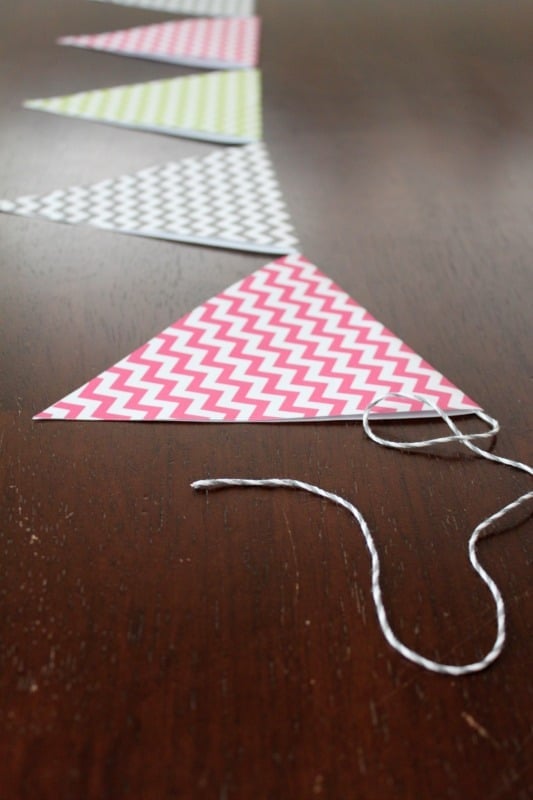
Now, take your string and lay it out. Leave about a foot of string on each end so that you can hang it when you are done. Open the triangle up (you’ll have a diamond shape) and put the string in the middle of the crease like the photo shows.
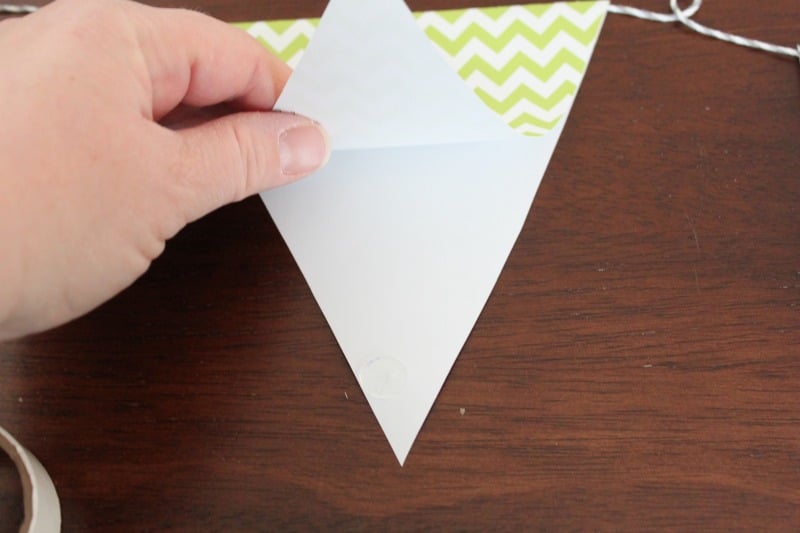
Next take your glue dots and place one ON the string and close up the triangle to keep it in place. Add another glue dot at the point of the triangle to close it up.
Do this for all of your triangles. Make sure to leave a little space in between each one so that it will hang nicely.
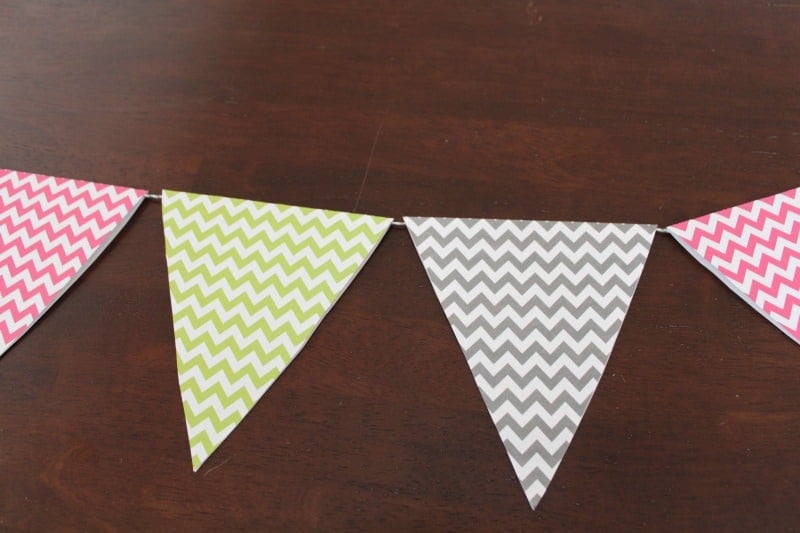
That’s it!! See how easy that was?!
You can now add letters or a message to each triangle or leave it blank! It’s up to you! Check back next week to see how I personalized our paper bunting and other items for the big party! I have more to share!
FAQS
Do you need a paper trimmer for this craft?
You don’t! You can cut a straight edge out of rectangle pieces that are different sizes just by going freehand. The edge of the paper doesn’t have to be perfectly straight.
Do you need a hole punch to add the string?
Nope! Not at all! The way that these bunting flags work is that you can take the end of the string or the end of the ribbon and put it through the folds on the vintage papers or cardstock that you’re using.
What is another fun way that you can use this craft?
I also think that this would be super fun for a table decoration idea as well to have to lay in the middle of the table. Simple and easy to do!
This paper bunting is easy and affordable! Try making your own next time you have a special event, a holiday, or even just for decoration in your house! It’s fun and easy to make!


I found your post through the link-up on the SITS Girls site and just in the knick of time. I was just thinking we needed to make a “Go Seahawks” banner to hang up for our Super Bowl party this weekend — and now I know just how to do it! Thank you!
That really does look easy to do, and it looks great! I could do this…what a great idea!
Wow so easy and I love easy!
Me too! haha!
Wow that is easy, I think even myself being craft challenged could give it a shot. Is it sad I had no idea it was called a bunting? 😉
I think you can do it!
This is so much fun! I love how easy it is to make.
It really was simple and adorable!
Those are SO cute! I’m partial to chevron, so I love the pattern. Thanks for the tutorial!
That looks effortlessly easy!
SO cute! And I love the Chevron!
This is adorable. Love your pattern. Such and easy thing to do. I need to remember this idea when party planning.
I love cute, easy, customizable decorations! Such a great idea for any party.
You make that look so easy! I would have totally been taping two pieces together at the top. 🙂
Okay, that does look pretty easy! 🙂 That really would be nice for a baby shower or birthday!